
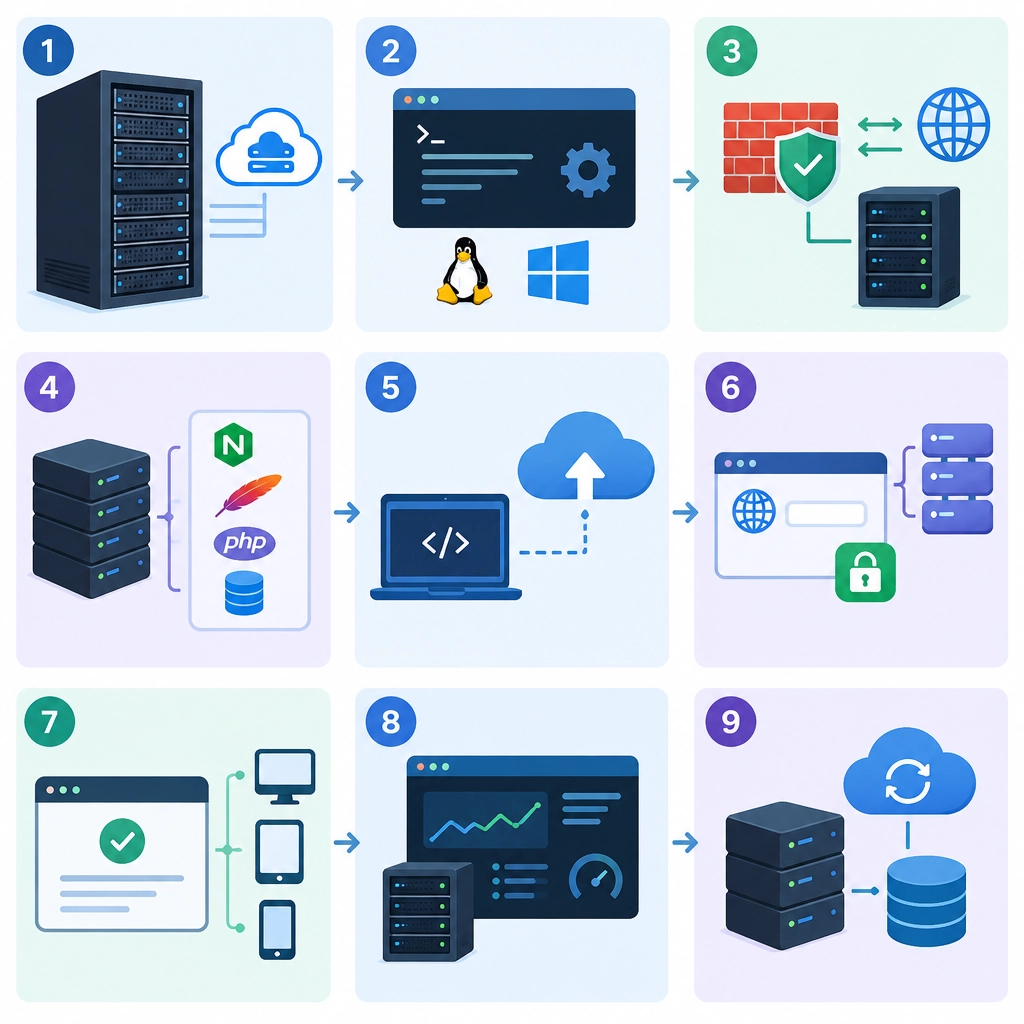
How to Set Up a Dedicated Server for Web Applications
A dedicated server gives your web application a machine of its own. That means you’re not sharing its CPU, memory, or storage with other customers’ workloads—a useful advantage when you need predictable performance, more control, or room to grow.
The setup can seem intimidating at first, but it becomes manageable when you break it into steps. Here’s a practical path from choosing a server to getting your app online.
1. Decide What Your Application Needs
Start with the app, not the hardware. Consider how many people you expect to serve, what your application does, and whether it relies on a database, background jobs, file uploads, or other services.
For a small application, a server with a few CPU cores and several gigabytes of RAM may be enough. A busy application or one that processes large files may need more. If you’re unsure, begin with a reasonable configuration and monitor how it performs before upgrading.
Think about storage, too. SSDs are generally a good choice for web workloads, especially when the application reads and writes data frequently. Check whether your hosting provider includes backups, a firewall, remote console access, and a way to reinstall the operating system.
2. Choose a Provider and Operating System
Select a hosting provider based on reliability, support, data-center location, and pricing—not just the lowest monthly rate. A server located near your users can help reduce latency.
For many web applications, a supported Linux distribution such as Ubuntu Server or Debian is a practical starting point. Choose a version that receives security updates and that your development team knows how to manage. You’ll usually receive an IP address and login instructions after provisioning.
3. Secure Access Before Deploying
Connect to the server using SSH. On your first login, update the operating system so you have current security fixes:
sudo apt update
sudo apt upgrade
Avoid using the root account for everyday work. Create a regular user with administrative privileges, then set up SSH key authentication rather than relying on a password. Once you’ve confirmed key-based access works, you can consider disabling password login and restricting SSH access through the firewall.
Enable a firewall and allow only the services you need. A typical web server allows SSH, HTTP, and HTTPS:
sudo ufw allow OpenSSH
sudo ufw allow 80/tcp
sudo ufw allow 443/tcp
sudo ufw enable
Security settings vary by application and environment, so make changes carefully and keep a way to access the server if you lock yourself out.
4. Install Your Web Stack
A common setup includes a web server, an application runtime, and a database. For example, Nginx can accept incoming web requests and pass them to an application built with Node.js, Python, PHP, or another framework. A database such as PostgreSQL or MySQL may run on the same server or on a separate managed service.
Install only the components you actually need. Fewer services mean fewer things to maintain and fewer potential entry points. Follow the official installation instructions for each tool, and make sure application processes run under a dedicated, unprivileged user rather than as root.
5. Deploy the Application and Connect Your Domain
Upload your application or pull it from a trusted Git repository. Store secrets—such as database passwords and API keys—in environment variables or a protected configuration file, not in public source code.
Configure the web server as a reverse proxy to your application, then point your domain’s DNS records to the server’s IP address. After DNS updates have taken effect, install an SSL/TLS certificate so visitors can connect over HTTPS. Many providers and certificate tools can automate renewals, but verify that renewal is working rather than assuming it will happen.
6. Add Backups, Monitoring, and Updates
A server isn’t finished when the homepage loads. Set up automated backups for both application files and database data, and occasionally test restoring them. A backup that can’t be restored isn’t much of a safety net.
Monitor disk space, memory, CPU usage, and application errors. Configure log rotation so log files don’t gradually fill the disk, and keep the operating system and application dependencies updated. For important applications, also document how to restart services and who should respond if something goes wrong.
A dedicated server offers control, but it also makes you responsible for the details. Start with a secure, simple configuration, automate routine tasks, and expand only when usage or monitoring data calls for it. That approach gives your application a dependable home—and gives you a clearer picture of what to improve next.
Welcome to DediRock, your trusted partner in high-performance hosting solutions. At DediRock, we specialize in providing dedicated servers, VPS hosting, and cloud services tailored to meet the unique needs of businesses and individuals alike. Our mission is to deliver reliable, scalable, and secure hosting solutions that empower our clients to achieve their digital goals. With a commitment to exceptional customer support, cutting-edge technology, and robust infrastructure, DediRock stands out as a leader in the hosting industry. Join us and experience the difference that dedicated service and unwavering reliability can make for your online presence. Launch our website.