
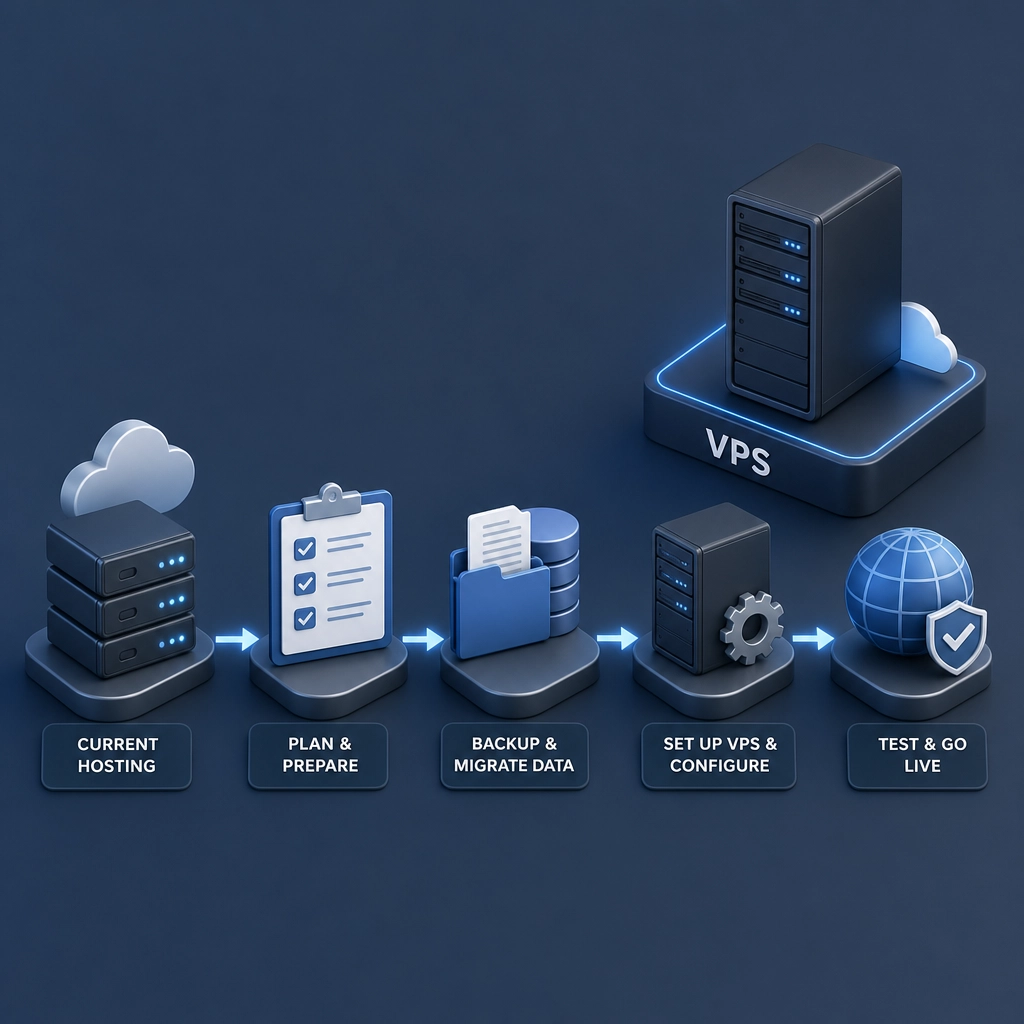
How to Migrate to a VPS Hosting Environment
If you’ve been using shared hosting and are starting to feel the constraints of your current setup—like slow load times, security concerns, or a lack of control—you might be considering a move to a Virtual Private Server (VPS) hosting environment. Migrating to a VPS can be a great decision for enhancing your website’s performance and reliability. But where do you start? Let’s break it down into bite-sized pieces so you can transition smoothly.
What is VPS Hosting?
Before we dive into the migration steps, let’s clarify what VPS hosting is. A Virtual Private Server provides you a dedicated portion of a physical server’s resources, giving you more control, flexibility, and performance than shared hosting. It’s like getting your own apartment in a building, as opposed to sharing a single room with a bunch of roommates. You’ll have your own space (resources), but there’s still some shared infrastructure.
Why Migrate to a VPS?
You might find yourself asking, "Why should I switch to a VPS?" Here are a few compelling reasons:
- Performance: With dedicated resources, your website can handle more traffic and deliver faster load times.
- Control: You gain root access, allowing you to install software and services tailored to your needs.
- Scalability: As your needs grow, a VPS can easily be upgraded to accommodate more resources.
- Security: Better isolation from other users means improved security.
Preparing for Migration
Before making the jump to a VPS, there are several steps you’ll need to take to prepare.
-
Choose the Right VPS Hosting Provider: Not all VPS environments are created equal. Look for reputable providers that offer suitable hardware, good customer support, and scalable options. Popular choices include DigitalOcean, Linode, and Vultr, among others.
-
Backup Your Data: Before any migration, it’s crucial to back up your entire website and databases. This ensures you have a restore point if something goes wrong during the transition. Most control panels offer backup options, but you can also manually download your website files and databases.
-
Communicate with Your New Provider: Reach out to your new VPS host to understand their setup process. They often provide helpful resources or guides tailored for newcomers.
Migrating Your Website
Once you’ve set everything up, it’s time for the actual migration process. Here’s a simplified step-by-step guide:
Step 1: Set Up Your VPS
Your new VPS will need an operating system and configurations. Most providers offer one-click installations for popular OS options like Ubuntu or CentOS. Choose the version you’re comfortable with, and set it up.
Step 2: Transfer Your Data
This can be done several ways, depending on your comfort level:
- FTP/SFTP: Connect to your new VPS using an FTP client like FileZilla to transfer files from your local machine or directly from your old host.
- rsync: If you prefer the command line, you can use the
rsynccommand to efficiently sync files between your old host and the new VPS. - Database Migration: If you’re running a database (like MySQL), export the database from your old host and import it into your new VPS. This usually involves creating a new database and user on your VPS and using tools like phpMyAdmin or command line to handle the export/import.
Step 3: Update DNS Settings
Once your files and databases have been moved, it’s time to point your domain to the new VPS. Access your domain registrar’s control panel and update the DNS records to reflect the new server’s IP address. Don’t forget that DNS changes can take some time to propagate—typically a few hours but sometimes longer.
Step 4: Test Everything
Before you officially switch over, make sure everything works as intended on the VPS. Check your website’s functionality, run speed tests, and ensure that all your plugins and themes are functioning properly.
Step 5: Monitor Post-Migration
After the site is live on your new VPS, keep an eye on its performance. Look out for issues that might arise from server configurations, especially around the database and application files. If everything goes smoothly, you can celebrate your successful migration!
Transitioning to a VPS hosting environment can feel daunting, but it can also be a game-changer for your website’s performance and your overall peace of mind. With careful planning and the right approach, you can make your migration experience smooth and painless. Enjoy your new space—you deserve it!
Welcome to DediRock, your trusted partner in high-performance hosting solutions. At DediRock, we specialize in providing dedicated servers, VPS hosting, and cloud services tailored to meet the unique needs of businesses and individuals alike. Our mission is to deliver reliable, scalable, and secure hosting solutions that empower our clients to achieve their digital goals. With a commitment to exceptional customer support, cutting-edge technology, and robust infrastructure, DediRock stands out as a leader in the hosting industry. Join us and experience the difference that dedicated service and unwavering reliability can make for your online presence. Launch our website.