
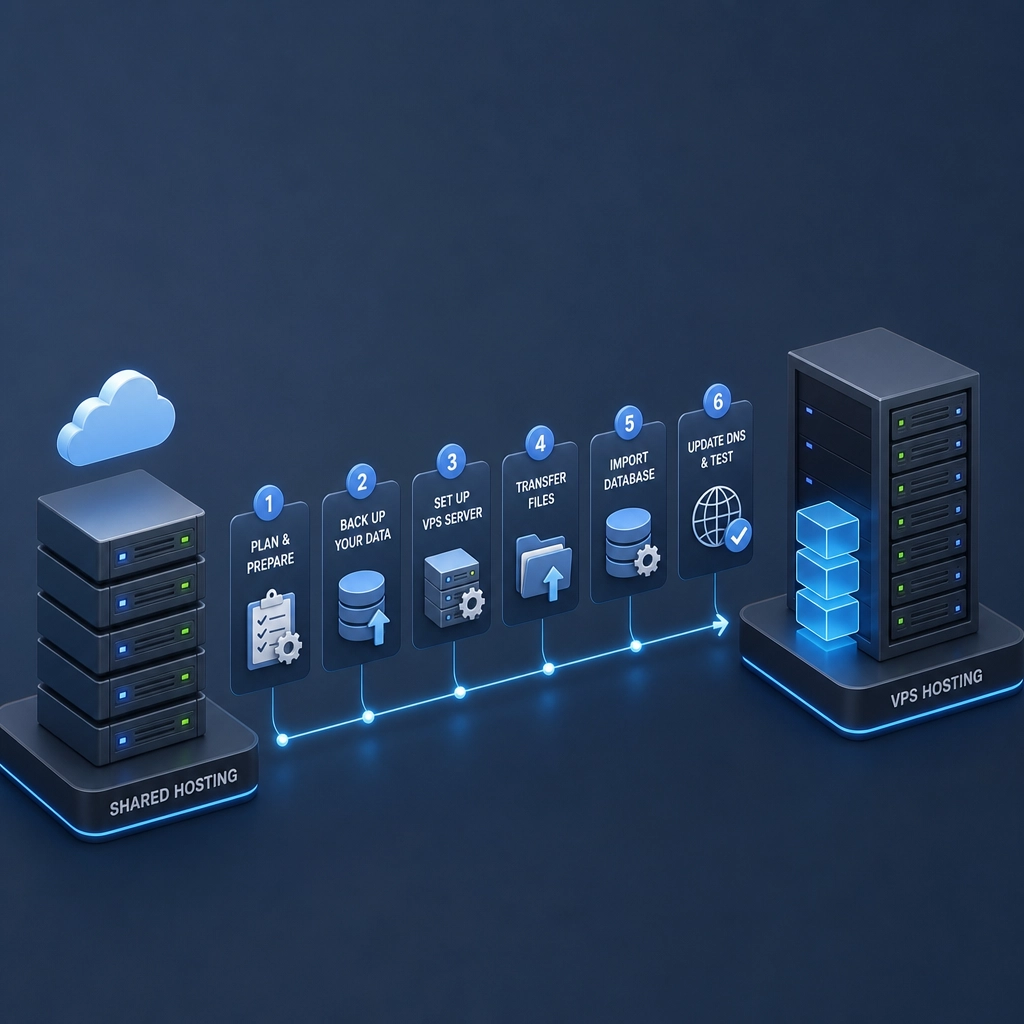
How to Migrate from Shared Hosting to VPS Hosting
Making the leap from shared hosting to VPS (Virtual Private Server) hosting can feel like moving from a cozy apartment to your very own home. You gain more room, freedom, and control—plus a whole lot of opportunities! If you’ve been feeling the constraints of shared hosting and are ready to upgrade, this guide will walk you through the transition with ease.
Understanding the Basics
Before diving into the migration process, let’s take a moment to unpack what VPS hosting really is. Unlike shared hosting, where multiple websites share the same server resources, VPS hosting gives you a dedicated slice of a server. This means you’ll have more power, better performance, and increased security—perfect for handling growing traffic or resource-intensive applications.
Why Make the Move?
You might be wondering if it’s worth the switch. If you’re experiencing slower load times, frequent downtime, or running into limits that hold back your site’s performance, then a VPS can provide the stability and resources you need. Plus, with a VPS, you can customize your server environment and software without the constraints imposed by shared hosting.
Preparing for Migration
1. Choose the Right VPS Provider
The first step in your migration journey is selecting a reliable VPS hosting provider. Do your research! Look for factors such as performance, support, scalability, pricing, and user reviews. Popular choices include DigitalOcean, Linode, and Bluehost.
2. Backup Your Data
Before you do anything, make sure to back up all your website files, databases, and any other critical data. You can do this through your hosting control panel, using tools like cPanel or Plesk, or by using command-line tools if you’re comfortable with them. Don’t skip this step—it’s your safety net in case something goes wrong during the migration.
3. Document Your Current Setup
Take note of your current hosting environment, including software versions and settings. Documenting this will help you replicate your environment on the new VPS. Make a list of your installed applications, databases, and any custom configurations.
The Migration Process
4. Set Up Your VPS Environment
Once you’ve chosen a provider and created your VPS, it’s time to set it up! If you’re not experienced with server management, many hosting providers offer one-click installations for popular software like WordPress, Joomla, or Drupal. You’ll also want to install a web server like Apache or Nginx and ensure you have the necessary security configurations in place.
5. Transfer Your Files and Databases
Now it’s time to move your data from the shared hosting to your VPS. You can do this manually via FTP/SFTP, or you can use command-line tools like rsync. If you have databases, use tools like mysqldump to export and mysql to import your databases into the new server.
If you’re using WordPress or similar platforms, there are plugins available to help facilitate this process, too. But don’t worry if that sounds like a lot—it’s usually straightforward once you get into it.
6. Adjust Configuration Files
After transferring your files, make sure to adjust any necessary configuration files. Update your database connection settings, change file paths if needed, and ensure that your site is configured to work in the new environment. This is where that handy documentation you made earlier comes into play!
Testing and Launch
7. Test Your Website on the VPS
Before updating DNS settings, it’s crucial to test your website thoroughly. Access the site using the VPS IP address and check that everything is functioning as expected. Go through your pages, test forms, and ensure databases are interconnected properly. This way, you can fix any issues before going live.
8. Update DNS Settings
Once you’ve verified everything is in order, you can update your domain’s DNS settings to point to your new VPS. Keep in mind that DNS changes can take some time to propagate (usually within a few hours, but sometimes up to 48 hours).
After this final step, your website will be up and running on your shiny new VPS!
Embrace the Possibilities
Migrating from shared hosting to VPS hosting opens up a whole new world of possibilities for your website. With the enhanced control and performance, you can focus more on what truly matters—growing your content, engaging visitors, and sharing your message.
While the migration may seem daunting at first, just remember to take it one step at a time. With careful preparation and a little patience, you’ll be enjoying the benefits of VPS hosting in no time! Your website deserves the best, and this leap could be just what it needs to thrive. Happy hosting!
Welcome to DediRock, your trusted partner in high-performance hosting solutions. At DediRock, we specialize in providing dedicated servers, VPS hosting, and cloud services tailored to meet the unique needs of businesses and individuals alike. Our mission is to deliver reliable, scalable, and secure hosting solutions that empower our clients to achieve their digital goals. With a commitment to exceptional customer support, cutting-edge technology, and robust infrastructure, DediRock stands out as a leader in the hosting industry. Join us and experience the difference that dedicated service and unwavering reliability can make for your online presence. Launch our website.