
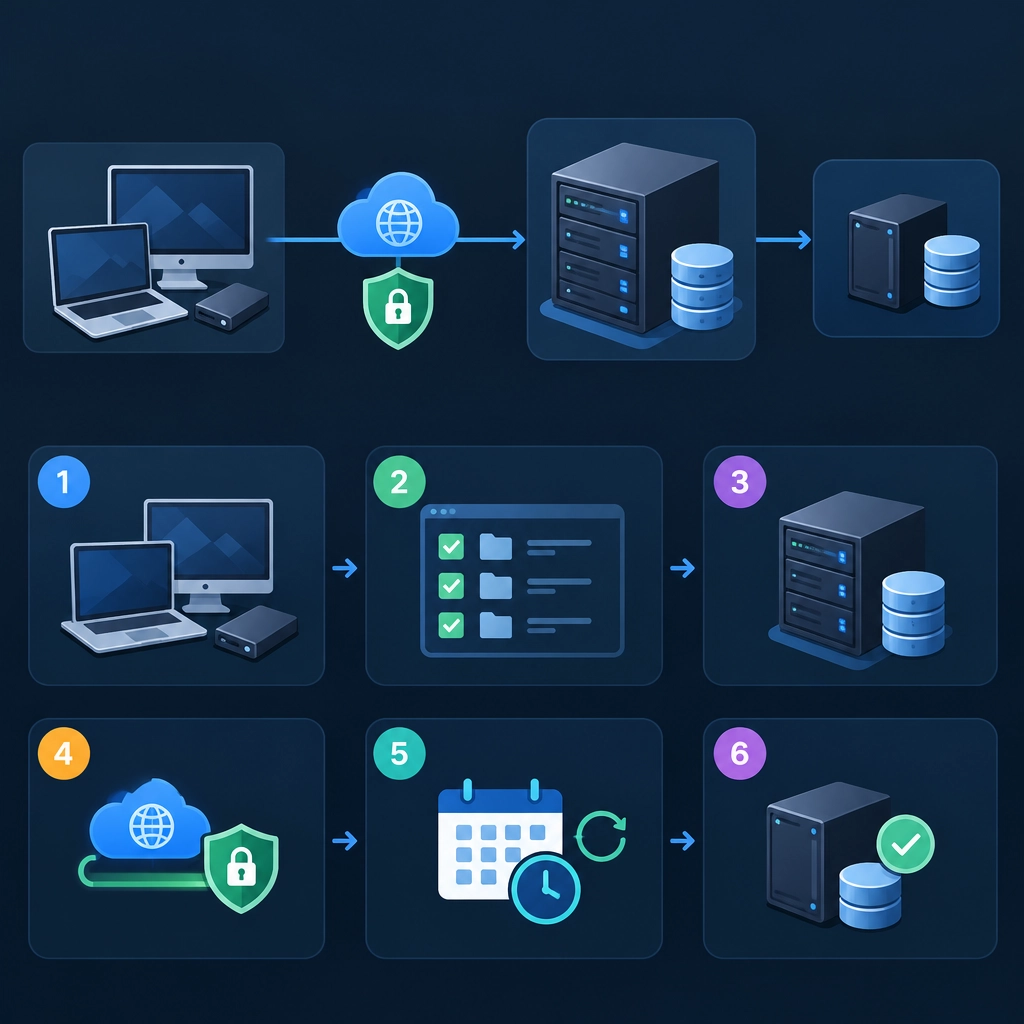
How to Build a Private Backup Solution with a Storage VPS
A storage VPS can be a practical home for backups: it’s available around the clock, separate from your everyday devices, and often offers plenty of disk space for the price. The best part is that you can keep your files private by encrypting them before they leave your computer.
Here’s how to put together a straightforward setup that’s secure, automated, and easy to maintain.
1. Choose a VPS that fits your needs
Start by estimating how much data you need to protect. Include not just your current files, but also room for older versions and future growth. Check the provider’s storage type, backup policies, bandwidth limits, and whether the plan allows the tools you intend to use.
For a private backup server, reliability matters more than flashy specifications. Look for a provider with a solid uptime record and clear policies about access to your data. Keep in mind that a VPS is not automatically a backup just because it stores files: if it’s your only copy, a hardware failure or account problem could still leave you stuck.
2. Secure the server before uploading anything
After creating the VPS, update its operating system and tighten access:
- Use SSH keys rather than password-based SSH login.
- Disable direct root login when possible.
- Create a separate account for backups.
- Configure a firewall to allow only the services you need.
- Keep the operating system and backup software updated.
Use a strong, unique password for the VPS provider account and enable two-factor authentication. These steps help protect the server, but encryption is still essential: server security controls who can log in, while encryption helps protect the contents of your backup.
3. Encrypt backups on your own device
For real privacy, encrypt files before they’re sent to the VPS. This way, the server stores encrypted data rather than readable documents, photos, or project files.
Tools such as Restic and BorgBackup can encrypt backups and preserve previous versions. Both work well for automated, encrypted backups, though their setup and repository formats differ. Choose one, read its current documentation, and stick with it rather than mixing tools without a plan.
During setup, create a strong encryption password. Store it somewhere safe—ideally in a reputable password manager and in a separate, secure recovery location. If you lose the password or key, the provider may not be able to help you recover your files.
4. Set up a dedicated backup account
It’s better not to let your backup software connect as root. Create a dedicated account on the VPS and give it access only to the directory where backup data should live. Configure SSH-key access for that account and, where supported, restrict the key to the backup purpose.
Then install or configure your chosen backup tool on your computer. A typical workflow is:
- Initialize an encrypted repository on the VPS.
- Select the folders you want to protect.
- Run a first backup and confirm it completes.
- Set a schedule for future runs.
- Configure a retention policy to remove old snapshots gradually.
A retention policy keeps storage use manageable. For example, you might retain several recent daily backups, a handful of weekly ones, and a few monthly snapshots. The right schedule depends on how often your files change and how long you may need to go back.
5. Automate backups—but keep an eye on them
A backup is useful only if it runs. Schedule it with a tool appropriate to your computer, such as a system service, task scheduler, or cron job. Configure notifications or logs so failures don’t go unnoticed.
For a laptop that’s often offline, run backups whenever it reconnects to the internet rather than relying on a fixed time. If your connection is limited, start with important folders and avoid backing up caches or temporary files that can be recreated.
6. Test recovery before you need it
The most commonly skipped step is also the most important: test a restore. Restore a few files to a different folder and open them. This confirms that the repository, encryption password, and restore process all work.
Repeat the test occasionally, especially after changing software, credentials, or VPS plans. Also check disk usage and backup logs from time to time. A successful message from last year doesn’t guarantee that today’s backups are still running.
A backup plan is stronger with more than one copy
A storage VPS gives you a useful off-site copy, but it shouldn’t be the only place your data lives. Keep the original files on your device and consider maintaining another backup on an external drive or separate service. That way, a VPS outage, account lockout, or local device failure is less likely to become a crisis.
With encryption, limited server access, automation, and occasional restore tests, a storage VPS can become a dependable part of a private backup routine—not just a remote disk, but a recovery plan you’ve actually tried.
Welcome to DediRock, your trusted partner in high-performance hosting solutions. At DediRock, we specialize in providing dedicated servers, VPS hosting, and cloud services tailored to meet the unique needs of businesses and individuals alike. Our mission is to deliver reliable, scalable, and secure hosting solutions that empower our clients to achieve their digital goals. With a commitment to exceptional customer support, cutting-edge technology, and robust infrastructure, DediRock stands out as a leader in the hosting industry. Join us and experience the difference that dedicated service and unwavering reliability can make for your online presence. Launch our website.