
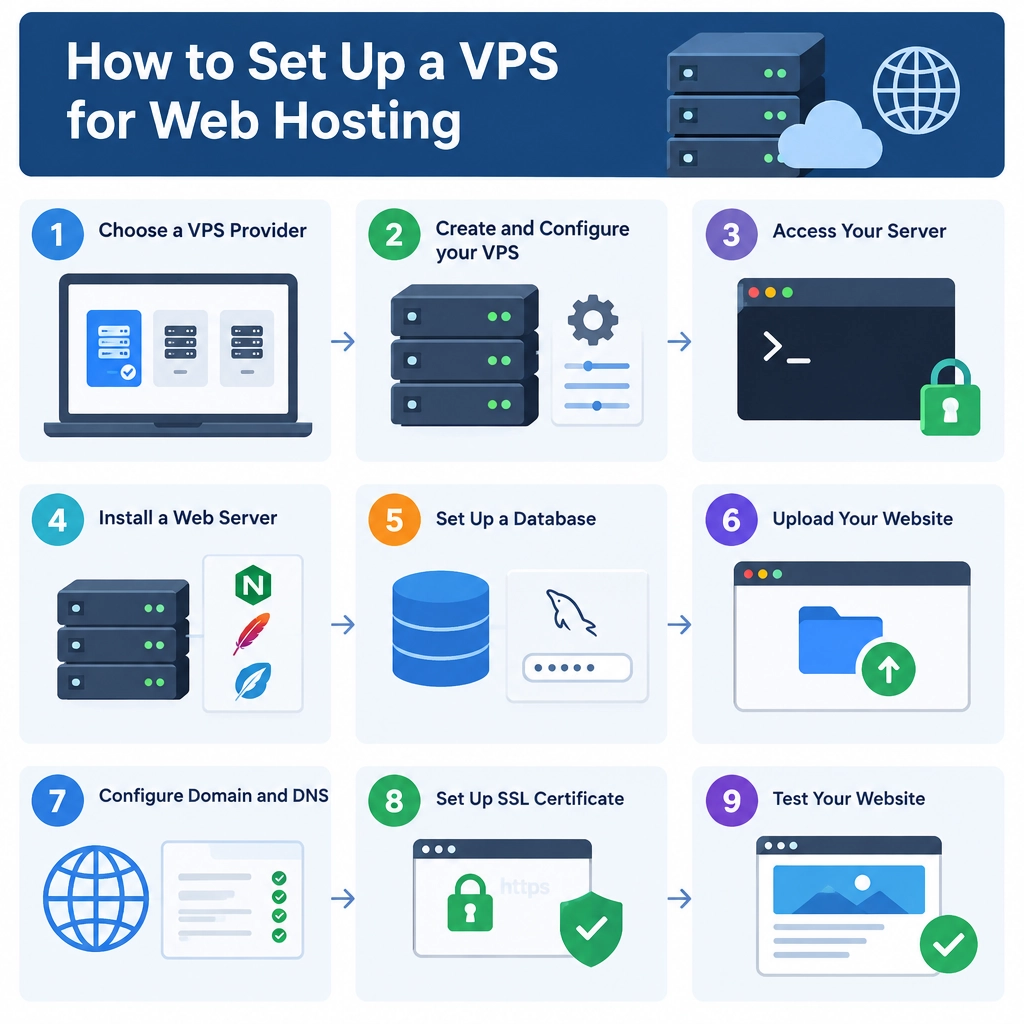
How to Set Up a VPS for Web Hosting
A virtual private server (VPS) gives you more control than shared hosting without the cost of a dedicated machine. You can install your own software, manage your website’s environment, and scale resources as your needs grow. The trade-off is that you’re responsible for keeping the server secure and running smoothly.
Here’s a practical walkthrough for getting a basic VPS ready to host a website.
1. Choose a VPS plan
Start by estimating what your site needs. A small blog or business site can often begin with one or two CPU cores, 1–2 GB of RAM, and modest storage. Busy sites, online stores, or resource-heavy applications may need more.
Look for a provider with reliable support, regular backups, data centers near your audience, and a straightforward upgrade path. For a first server, choose a Linux distribution with strong documentation—Ubuntu LTS is a popular option.
2. Connect to your server
After ordering, your provider will give you an IP address and login details. On macOS or Linux, open a terminal and connect with SSH:
ssh root@YOUR_SERVER_IP
On Windows, you can use Windows Terminal or an SSH client. Replace YOUR_SERVER_IP with the address supplied by your host. If prompted, confirm the server’s fingerprint, then enter your password or use your SSH key.
3. Update the system and create a user
First, install available security and software updates:
apt update && apt upgrade -y
Avoid using the root account for everyday administration. Create a regular user and give it permission to run administrative commands:
adduser webadmin
usermod -aG sudo webadmin
Sign out, then reconnect as that user:
ssh webadmin@YOUR_SERVER_IP
For better security, set up SSH key authentication and test it before disabling password logins. Keep an existing session open while changing SSH settings so you can recover if something goes wrong.
4. Configure a firewall
A firewall helps limit which network connections can reach the server. If you’re using Ubuntu, UFW is a beginner-friendly option:
sudo ufw allow OpenSSH
sudo ufw allow 80
sudo ufw allow 443
sudo ufw enable
Ports 80 and 443 are used for regular and secure web traffic. Allow SSH before enabling the firewall, or you could lock yourself out. If your VPS provider has its own cloud firewall, check its rules too.
5. Install a web server
A web server receives visitors’ requests and delivers your site. Nginx and Apache are common choices. For a simple Nginx setup:
sudo apt install nginx -y
Then visit your server’s IP address in a browser. If Nginx is running, you should see its default welcome page. You can check the service with:
sudo systemctl status nginx
For a dynamic site, you may also need a runtime or application server—for example, PHP for many WordPress installations or Node.js for a JavaScript application. Install only the software your site actually needs.
6. Point your domain to the VPS
In your domain registrar’s DNS settings, create an A record for your domain and point it to the VPS’s public IPv4 address. You may also want a www record that points to the same address.
DNS changes can take time to appear everywhere. Once the domain resolves correctly, configure a server block (in Nginx) or virtual host (in Apache) for your domain, and set its document root to your website’s files.
7. Enable HTTPS and deploy your site
HTTPS encrypts traffic between your site and its visitors. A common free option is Let’s Encrypt. For Nginx on Ubuntu, Certbot can often handle the certificate and configuration:
sudo apt install certbot python3-certbot-nginx -y
sudo certbot --nginx
Follow the prompts to select your domain. Before running this, make sure the domain points to the server and ports 80 and 443 are reachable.
Upload your site using Git, SFTP, or a deployment tool. Set appropriate file permissions, and avoid placing secret configuration files—such as database passwords—in a publicly accessible web directory.
8. Keep it maintained
A VPS is not a “set it and forget it” setup. Apply updates regularly, use strong authentication, monitor disk space and server health, and create backups you can actually restore. Consider enabling automatic security updates and setting up uptime alerts.
Once the essentials are in place, your VPS can grow alongside your website. Start with a simple, well-documented setup, make one change at a time, and keep a record of what you configure. That makes future troubleshooting much less daunting—and gives you a solid foundation to build on.
Welcome to DediRock, your trusted partner in high-performance hosting solutions. At DediRock, we specialize in providing dedicated servers, VPS hosting, and cloud services tailored to meet the unique needs of businesses and individuals alike. Our mission is to deliver reliable, scalable, and secure hosting solutions that empower our clients to achieve their digital goals. With a commitment to exceptional customer support, cutting-edge technology, and robust infrastructure, DediRock stands out as a leader in the hosting industry. Join us and experience the difference that dedicated service and unwavering reliability can make for your online presence. Launch our website.