
If you want to install DHCP server in Windows Server, here’s how you can do it. You can manage the installation or removal of a DHCP server via the Server Manager or PowerShell.
A DHCP, or Dynamic Host Configuration Protocol server, simplifies configuring an organization’s network by automating IP address assignment to client computers. Once set up, no further manual intervention is required.
To install the DHCP server in Windows Server, follow these steps:
Open the Server Manager and navigate to Manage > Add Roles and Features.
Then, choose the Role-based or feature-based installation option and click the Next button.
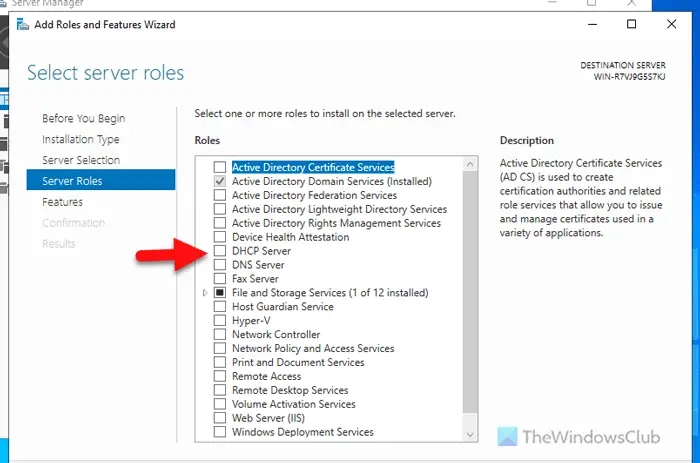
Next, choose the desired server from the server pool. However, if you have only one server, you do not need to do anything else except click on the Next button.
Following that, tick the DHCP Server checkbox and click the Next and Add Features button.
Finally, click the Install button to start the installation process. Once done, you can close all the windows.
To install a DHCP server on Windows Server using PowerShell, follow these steps:
For more details, continue reading.
Begin by launching PowerShell with administrator privileges. To do this, type powershell into the Taskbar search box, right-click on the result, choose the Run as Administrator option, and confirm by clicking on the Yes button.
When PowerShell is open, enter the following command:
Let it be finished. Once done, you can close the PowerShell window.
To uninstall DHCP server from Windows Server, follow these steps:
Open the Server Manager on your computer and click on Manage > Remove Roles and Features.
Then, choose the server from the server pool and click on the Next button. Following that, remove the tick from the DHCP Server checkbox.
Once completed, a window will appear displaying all the DHCP tools installed on your server. You can expand the list to see every tool. Then, select the Remove Features button.
This action will take you to the Features tab. Here, you simply need to press the Next button.
Afterward, press the Remove button on the confirmation window that appears.
When all steps are completed, close all the windows and restart your server. You have the option to select the Restart the destination server automatically if required checkbox before hitting the Remove button, which will automatically restart the server if needed.
Read: Disable or Enable DHCP for Ethernet or Wi-Fi in Windows
To configure a DHCP server, start with the Server Manager and opt for the Role-based or feature-based installation. Select your server from the server pool, mark the DHCP Server checkbox, and choose the additional features you wish to install. Click on the Install button to complete the process. Alternatively, launch PowerShell as an administrator and input: Install-WindowsFeature DHCP -IncludeManagementTools.
Activating DHCP via CMD on Windows Server is not feasible. However, you can utilize PowerShell with the Install command. Search for PowerShell using the Taskbar, right-click to run as Administrator, and confirm by clicking Yes. Type: Install-WindowsFeature DHCP -IncludeManagementTools. The installation will complete after a short while.
Read: Fix Unable to contact your DHCP Server error on Windows.
Published on September 7, 2024 Tags: Server
July 25, 2024
July 18, 2024
September 5, 2024
September 4, 2024
Welcome to DediRock, your trusted partner in high-performance hosting solutions. At DediRock, we specialize in providing dedicated servers, VPS hosting, and cloud services tailored to meet the unique needs of businesses and individuals alike. Our mission is to deliver reliable, scalable, and secure hosting solutions that empower our clients to achieve their digital goals. With a commitment to exceptional customer support, cutting-edge technology, and robust infrastructure, DediRock stands out as a leader in the hosting industry. Join us and experience the difference that dedicated service and unwavering reliability can make for your online presence. Launch our website.