
Setting Up Your First VPS: A Step-by-Step Guide
So, you’ve decided it’s time to level up your online presence by setting up your very own Virtual Private Server (VPS). Whether you need it for hosting a website, running applications, or experimenting with different configurations, a VPS gives you much more control than shared hosting. But for a newbie, the idea of setting up a VPS can feel daunting. Don’t worry! I’m here to walk you through the process step by step. Let’s dive in!
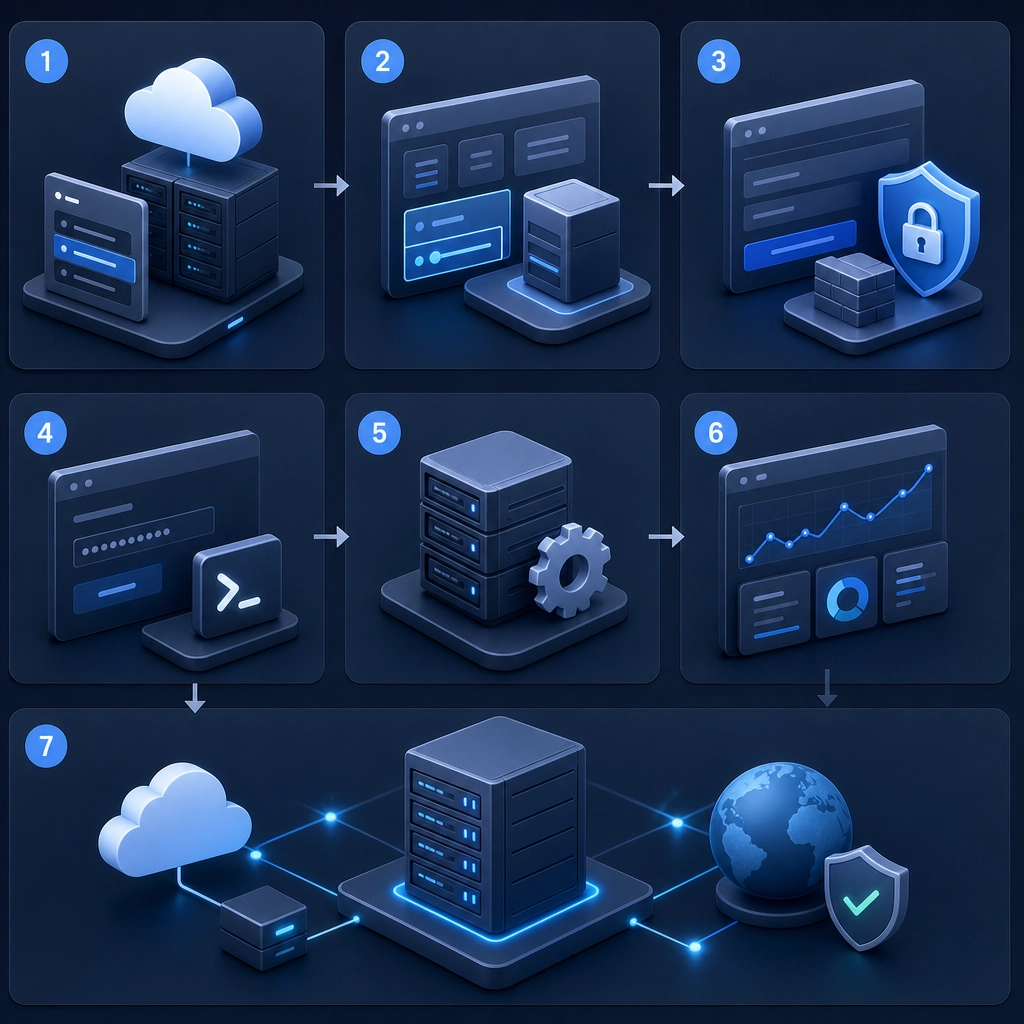
Step 1: Choose Your VPS Provider
First things first, you need to find a VPS hosting provider that suits your needs. Popular options include DigitalOcean, Linode, Vultr, and AWS Lightsail. Each provider has its pros and cons, so take a moment to consider what’s important to you: price, performance, support options, or perhaps ease of setup. Most providers offer various plans based on RAM, CPU, and storage, so you can pick one that fits your budget and project requirements.
Step 2: Sign Up and Select a Plan
Once you’ve picked a provider, head over to their website and sign up for an account. You’ll need to provide some basic information, often including payment details, so make sure you’re comfortable with their pricing model before committing.
When selecting a VPS plan, start with a small instance. You can always upgrade as your needs grow, and it’s better to start small while you get the hang of things. Look for options that allow you to choose your server’s location; it’s usually best to pick a server close to your target audience to reduce latency.
Step 3: Choose Your Operating System
Most VPS providers give you a choice of operating systems during the setup process. The two most popular options are:
- Linux Distributions (like Ubuntu or CentOS): Excellent for web servers and they’re typically free. If you’re comfortable with command-line interfaces, this is a great choice.
- Windows Server: If you need specific software that runs on Windows, this could be your best bet, but it usually comes at a higher cost.
Select the OS that aligns with your goals. If you’re just starting out, I recommend going with Ubuntu—it’s user-friendly and has a ton of community support.
Step 4: Configure Your VPS
After selecting your OS, you’ll get to the configuration screen. This is where you can define the server’s resources—CPU, memory, and storage. Depending on the provider, you might also have options for backups and security settings. Make sure to enable backups for peace of mind; you never know when you might need to roll back to a previous version. Lastly, set your username (often just ‘root’ for the initial setup) and password.
Step 5: Accessing Your VPS
Once your server is provisioned, you’ll receive your VPS’s IP address. To connect to your server, you can use an SSH client like PuTTY (if you’re on Windows) or just your command line (Linux or macOS). Open your terminal (or SSH client), type:
ssh username@your_server_ip
Replace username with the one you set up (often root) and your_server_ip with the actual IP address. You’ll be prompted to enter your password—do it, and voila, you’re in!
Step 6: Secure Your VPS
Before you start installing software or setting up services, it’s essential to secure your VPS. Here are a few quick tips:
- Change the Default SSH Port: This can help reduce automated attacks. You can configure this in your SSH configuration file, usually located at
/etc/ssh/sshd_config. - Set Up a Firewall: Tools like UFW (Uncomplicated Firewall) make it easy to manage firewall rules. Typically, you’ll want to allow SSH and perhaps HTTP/S if you’re running a web server.
- Disable Root Login: Instead of logging in as root, create a new user and grant them sudo privileges. This is a classic security practice that minimizes risks.
Step 7: Install Necessary Software
Now comes the fun part—installing the software you need! Depending on what you’re planning to do with your VPS, this might include:
- Web Servers: Software like Nginx or Apache.
- Databases: MySQL or PostgreSQL.
- Development Tools: Docker, Git, or any necessary programming language interpreters.
If you’re not sure where to start, the community documentation for your chosen stack is a treasure trove of information.
Step 8: Enjoy Your New VPS!
After you’ve made your configurations and installed the necessary software, take a moment to enjoy your success. You’ve just set up your first VPS! Now you can start deploying your applications, hosting your site, or learning more about server management.
Setting up a VPS can seem a bit overwhelming at first, but by following these steps, you’ll find that it’s manageable, and each step you complete brings you closer to mastering your server environment. So go ahead and explore the endless possibilities waiting for you in this exciting new digital playground. Just remember to keep learning and experimenting, and soon you’ll be a VPS pro!
Welcome to DediRock, your trusted partner in high-performance hosting solutions. At DediRock, we specialize in providing dedicated servers, VPS hosting, and cloud services tailored to meet the unique needs of businesses and individuals alike. Our mission is to deliver reliable, scalable, and secure hosting solutions that empower our clients to achieve their digital goals. With a commitment to exceptional customer support, cutting-edge technology, and robust infrastructure, DediRock stands out as a leader in the hosting industry. Join us and experience the difference that dedicated service and unwavering reliability can make for your online presence. Launch our website.